Food Safety
25/11/2022 |
How to enable compliance and safety in the food industry with software systems

The solution is a directive-compliant food production that guarantees process reliability as well as maximum efficiency and quality. Whether metal detection or X-ray inspection - new software developments ensure that production machines always work flawlessly and reduce product waste. Moreover, thanks to the paperless documentation in the machine, you are optimally protected from tampering thanks to seamless monitoring and documentation.
Quality control in six steps for the greatest possible detection accuracy
For you, as a food manufacturer, product quality and productivity is a top priority. In addition, you are required by law to comply with a whole range of food standards.
For inspection systems to function reliably, quality controls must be carried out regularly. Partners for inspection systems can support you in this: from advice on the selection of the right device to its functional testing on the basis of test bodies in actual production operation, in addition to an annual maintenance which includes issuance of a certificate.
The following six steps guarantee the best detection performance of inspection systems and directive-compliant production in the food industry: 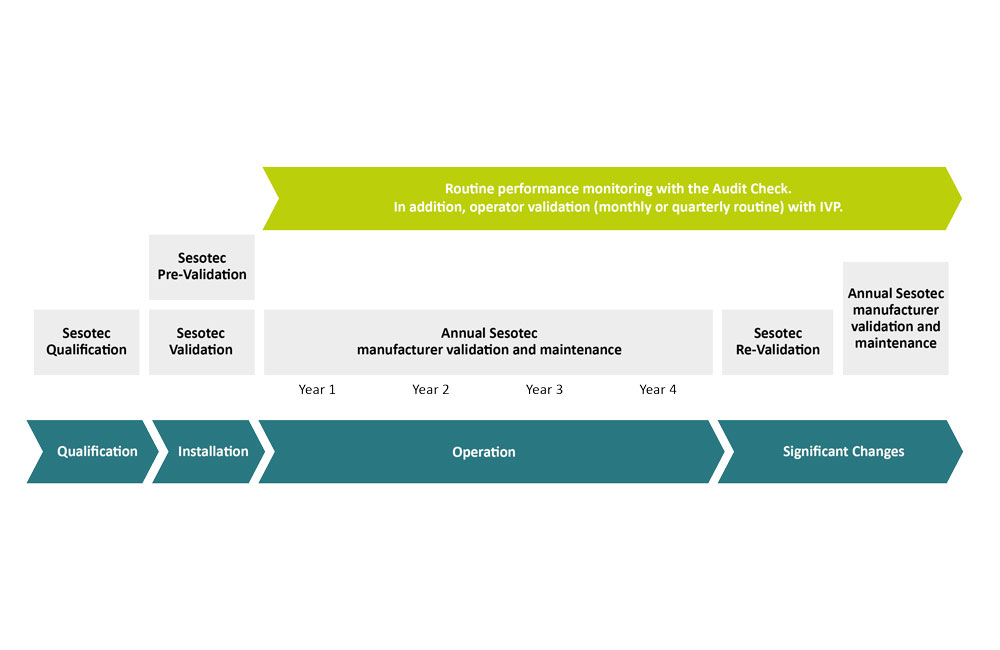
- Qualification: Ensuring that the correct device/system is selected for the detection of foreign bodies and thus are in compliance to the risk assessment carried out for the food safety program. The qualification includes the verification of the probability of detection (P.O.D) for all available foreign body types (10/10 detection passes).
- Pre-Validation: Commissioning of the device by the manufacturer in advance of production with test product. Determine the detection confidence level using certified foreign body test standards with test product (at least 10/10 runs per test standard and product group) and measure the potential false reject rate (F.R.R.).
- Validation / Re-Validation: First confirmation of the F.R.R. as well as the P.O.D. under production conditions for all available foreign body types (at least 10/10 passes for each foreign body type and each product group) or re-validation of the detection accuracy and false reject rate after a substantial change in the production line by the manufacturer.
- Monitoring: Daily / Hourly check of operational readiness of the inspection system before start of production or after product change. Testing the device with at least one detection / rejection run of a test body. The regular review takes place via the audit check by the operator.
- Operator Validation: In conjunction with the Integrated Validation Process (IVP) software, the operator also carries out validations at regular intervals (monthly / quarterly), validate further products and document it in the “Report of Validation” and save it to the device.
- Manufacturer Validation: Checking the electrical properties as well as the safety of the device and creation of a validation certificate (including confirmation of the F.R.R. and the P.O.D.) and a service report by the manufacturer. The manufacturer validation should be done annually.
But how can you guarantee that the quality is assured?
The more quality controls, the better. In practice, this can only be implemented by means of automated software functions that take over functional tests of inspection devices.
Read here which software functions these are.
Five innovative software functions for seamless and efficient food safety documentation
Food safety knows no compromise and a seamless and efficient documentation is necessary. The following five software functions make this possible:
1. Auditcheck – Continuous quality monitoring
The regular execution of an audit routine, in which all steps are logged, is enormously important to ensure consistently high product quality. In just three steps - Request, Audit Check, Result - the results of the inspection of the concerned production step are stored in a logbook. In the event of an incorrect routine, the conveyor line is stopped.
Advantages
- An audit routine is ensured and logged
- Continuous quality monitoring
- Consistently high product quality
2. Sensitivity prediction – Automatic determination of the detection sensitivity
The most suitable detection sensitivity for different foreign bodies is automatically determined by the software after the teach-in process and after changes and reliably meets customer requirements.
Advantages
- Instant overview of the sensitivity level
- Simple adjustment with the required detection sensitivity
- Enormous time savings during the teach-in process
- Easy determination of the best inspection level for the product to be inspected
3. Compliance Mode – Highest process stability
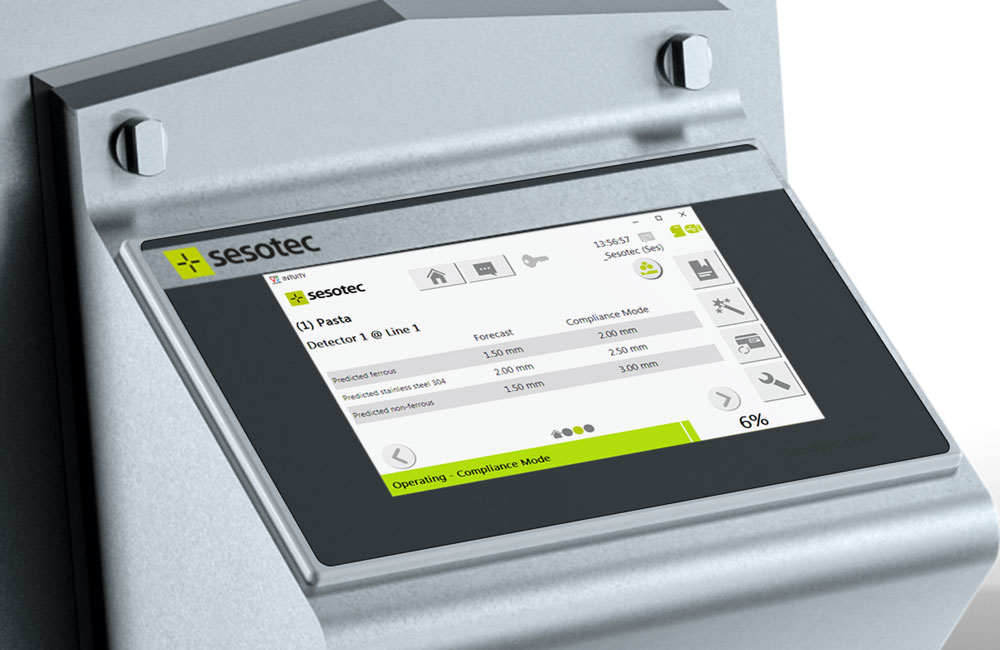
The sensitivity can be set to factory or audit standards at the push of a button to produce compliantly and, at the same time, to reduce the false rejection rate. Process stability is thus constantly maintained.
The user can store in the system what is to be done in the event of non-compliance with the configured sensitivity prediction whether a warning message or even a stop of the production line.
Advantages
- Compliance with the food safety standards
- Savings in labor, packaging and product waste
- Increase in production efficiency
- Display of the predicted power and conformity values with simple verification
- For X-ray inspection systems: less relearning for difficult product
4. Integrated Compliance Monitoring (ICM) – Always under control
The detection performance of
the inspection system is continuously monitored, resulting in immediate
detection of deviations and increasing the stability of the production
process. This function works with a
two-step approach: self-monitoring of the detection unit and compliance mode.
Functionality in metal detection
The detector is controlled by an internal test signal, which is tuned to the product during the learning process. For easy and quick verification, the predicted power as well as the conformity values are displayed. As soon as the received information does not match the specific requirements, the system issues an error or warning message, depending on the configuration.
Functionality during X-ray inspection
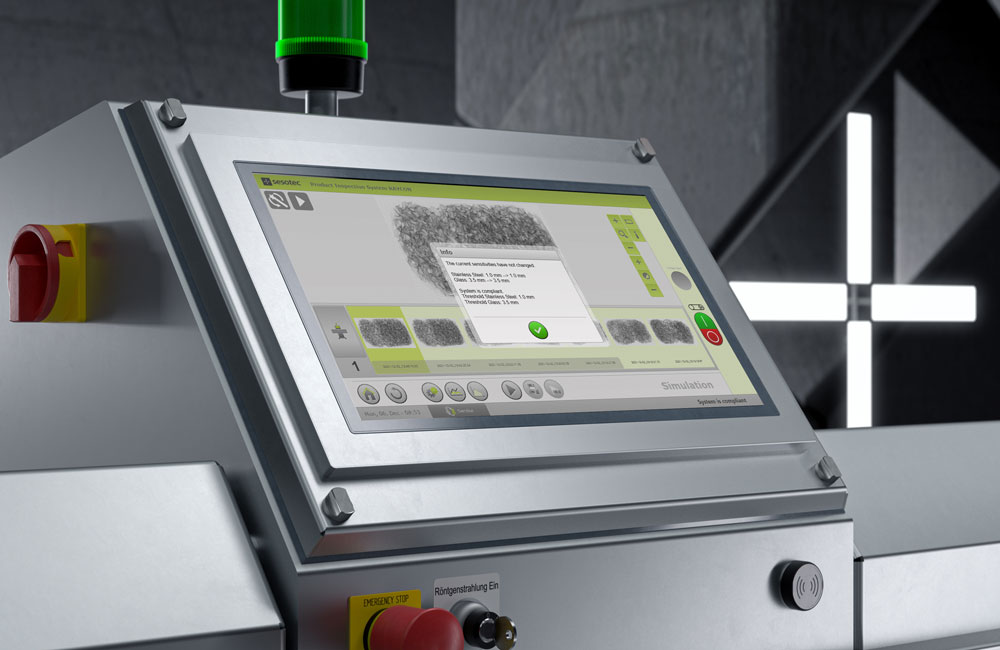
The initial sensitivities are calculated directly after the auto train process and saved. The current sensitivity for stainless steel and glass are continuously and automatically checked after a fixed time interval. The sensitivity limits can be set manually. If the limit values are exceeded, there will be an error or warning message.
Advantages
- Compliance with food safety standards
- Savings in working time, packaging and product waste
- Increase in production efficiency
- Increase in product quality
- Reduces the risk of inadequate quality controls and records
5. Integrated Validation Process (IVP) – Transparent and complete documentation
The Validation Process is a documentation tool and yields proof that the desired quality objectives for the respective product have been achieved. Based on multiple samples is ensured that the results are consistent. In this way, the metal detector keeps track and warn automatically if, before the next audit, a renewed validation is required.
The validation takes place in 2 steps:
- Calculation of the false reject rate (F.R.R.)
- Calculation of the probability of detection (P.O.D.)
A granted validation certificate of the manufacturer´s service is unique because it provides proof of the normal distribution of the tested product and another limit or control point for daily routine tests.
Advantages
- Consistent validation
- Automatic creation of a backup of all settings in order to be able to restore the device to the state of validation
- Records in the metal detector
- Setting realistic testing standards and ensuring compliance
- Reliable reporting data
- The user automatically receives a notification for the next validation, eliminating the need to apply stickers that wash off
- The certificate can be saved in PDF format on a USB stick
Service support you on the way to directive-compliant food production
For all other existing
installations offer inspections systems´ manufacturers a Validation as a
service. The service includes
the preparation of the annual validation certificate and of a maintenance
report. Among other things, a repeat test of the probability of detection
(P.O.D.) is carried out at the most unfavorable point of the metal detector
using the specified test bodies.
Advantages
- Performance of the retest including evaluation and documentation
- Determination of the limit value to provide further security for the customer during daily routine testing
Conclusion
While hi-performance detection systems have
traditionally met the prerequisites; with the continuous evolution of food
safety standards, just having the detection system is no longer sufficient.
Innovative software packages such as IVP and ICM automate the process, thus
ensuring the highest levels of food safety with efficient documentation and
compliance.

